How to create automated and reproducible work flows for installing scientific software
In any organisation systems administration is a big role, which entails making sure the systems everyone take for granted just work. Email, internet, etc; everything needs to function 24/7.
But as computational scientists we need specialist software, written by and for scientists. This means that we often have to rely on ourselves to do some basic systems administration to install and manage scientific software.
The question then arises: how can one effectively configure machines to run scientific software? Particularly as installing software written by other scientists can often be a torturously painful process.
In this post I will outline a method for producing work flows that result in automated and reproducible software installations.
Let us start on the assumption that we have been given a clean machine running CentOS 6.5 by the IT department and now it us up to us to configure it with our scientific software.
Vagrant - create your own virtual machine
Let us refer to the machine give to us by the IT department as the production machine. This could be a physical box or a virtual machine, it does not really matter.
At this point we do not want to experiment with our production machine. Instead we will create a virtual machine on our desktop, which we will refer to as the testing machine. Depending on your interest in virtualisation you may already have heard of and used VirtualBox. It is a tool for creating virtual machines. If you have not already installed VirtualBox do so now (VirtualBox downloads).
Rather than working with VirtualBox directly we will make use of Vagrant. Vagrant is a command line utility for working with VirtualBox and other virtual machine providers such as VMWare and AWS. Here is a link to the Vagrant downloads.
We are now in a position to create and work with virtual machines solely from the command line. Let us start by creating a Vagrant file for setting up a CentOS 6.5 box.
$ vagrant init chef/centos-6.5
The command above creates a file named Vagrantfile, which in its most basic
form simply specifies the Linux image to provision the virtual machine with. In
this instance the image from:
atlas.hashicorp.com/chef/boxes/centos-6.5.
Let us have a quick look at the Vagrantfile file.
Vagrant.configure(2) do |config|

  config.vm.box = "chef/centos-6.5"

end
Above I have left out all the comments giving further suggestions on how to configure the setup of the virtual machine.
Let us spin up the virtual machine and ssh into it.
$ vagrant up
$ vagrant ssh
Last login: Fri Mar  7 16:57:20 2014 from 10.0.2.2
[vagrant@localhost ~]$ pwd
/home/vagrant
As you can see Vagrant has configured ssh to allow the vagrant user to
login without a password. Let’s close the ssh connection and find more details
about the ssh configuration.
[vagrant@localhost ~]$ exit
logout
Connection to 127.0.0.1 closed.
$ vagrant ssh-config
Host default
  HostName 127.0.0.1
  User vagrant
  Port 2222
  UserKnownHostsFile /dev/null
  StrictHostKeyChecking no
  PasswordAuthentication no
  IdentityFile /home/olsson/.vagrant/machines/default/virtualbox/private_key
  IdentitiesOnly yes
  LogLevel FATAL
Finally, let us have a look at the Vagrant help.
$ vagrant help
Usage: vagrant [options] <command> [<args>]

    -v, --version                    Print the version and exit.
    -h, --help                       Print this help.

Common commands:
     box             manages boxes: installation, removal, etc.
     connect         connect to a remotely shared Vagrant environment
     destroy         stops and deletes all traces of the vagrant machine
     global-status   outputs status Vagrant environments for this user
     halt            stops the vagrant machine
     help            shows the help for a subcommand
     init            initializes a new Vagrant environment by creating a Vagrantfile
     login           log in to HashiCorp's Atlas
     package         packages a running vagrant environment into a box
     plugin          manages plugins: install, uninstall, update, etc.
     provision       provisions the vagrant machine
     push            deploys code in this environment to a configured destination
     rdp             connects to machine via RDP
     reload          restarts vagrant machine, loads new Vagrantfile configuration
     resume          resume a suspended vagrant machine
     share           share your Vagrant environment with anyone in the world
     ssh             connects to machine via SSH
     ssh-config      outputs OpenSSH valid configuration to connect to the machine
     status          outputs status of the vagrant machine
     suspend         suspends the machine
     up              starts and provisions the vagrant environment
     version         prints current and latest Vagrant version

For help on any individual command run `vagrant COMMAND -h`

Additional subcommands are available, but are either more advanced
or not commonly used. To see all subcommands, run the command
`vagrant list-commands`.
Note the vagrant halt and vagrant destroy commands to stop and delete
the vagrant machine respectively.
Ansible - configure your virtual machine
The aim of the game is to make the process of installing our scientific software of interest reproducible and automated!
We will use the testing virtual machine provisioned using Vagrant to experiment with scripts to configure it.
My favorite tool for configuring machines is Ansible. It is written in Python and makes use of the OpenSSH protocol. Unlike many other configuration tools, such as Puppet and Chef, Ansible is agentless. In other words it does not require you to install an agent on the machine that you want to configure, which makes it much easier to use. It is also very easy to install, here is a link to the Anisble installation notes.
Ansible uses the YAML file format. Let us create
a file named playbook.yml.
---
# A basic playbook that simply checks who I logged in as.
- hosts: all
  tasks:
  - name: run the whoami command
    command: whoami
To configure the Vagrant testing machine we simply need to update the
Vagrantfile file; inserting the provisioning section below.
Vagrant.configure(2) do |config|

  config.vm.box = "chef/centos-6.5"

  config.vm.provision "ansible" do |ansible|
    ansible.playbook = "playbook.yml"
  end

end
We can now configure the Vagrant testing machine using the command below.
$ vagrant provision
==> default: Running provisioner: ansible...

PLAY [all] ********************************************************************

GATHERING FACTS ***************************************************************
ok: [default]

TASK: [run the whoami command] ************************************************
changed: [default]

PLAY RECAP ********************************************************************
default                    : ok=2    changed=1    unreachable=0    failed=0
At this point our Ansible playbook does not really do anything useful. It
simply uses the command module to run the whoami program.
Ansible comes with a whole host of built in modules. For example yum, apt and homebrew are but a few of the modules for operating system package management. It also has pip, cpanm and gem modules for managing Python packages, Perl modules and Ruby gems respectively. There is also a vast array of modules for working with files. For more information check out the Ansible module index.
Below is a slightly more involved playbook for installing
the Bio::Perl module. The playbook deals with a number of complications.
It installs gcc to be able to compile some of the Perl
modules. It installs cpan and cpanm to make it easier to install
Perl modules. Further, Bio::Perl has some implicit dependencies that are
not taken care of automatically when installing it using cpanm, so the playbook
installs these dependencies first.
---
- hosts: all
  sudo: True

  tasks:
    - name: install gcc required to build some Perl modules
      yum: name=gcc
           state=present

    - name: install cpan and perl-devel
      yum: name={{ item }}
           state=present
      with_items:
        - perl-devel
        - perl-CPAN

    - name: download cpanm
      get_url: url=https://cpanmin.us/
               dest=/tmp/cpanm.pl
               mode=755

    - name: install cpanm so that we can use the ansible cpanm module
      command: perl cpanm.pl App::cpanminus
      args:
        chdir: /tmp/
        creates: /usr/local/bin/cpanm

    - name: add cpanm symbolic link to /usr/bin/
      file: src=/usr/local/bin/cpanm
            dest=/usr/bin/cpanm
            state=link

    - name: install implicit Bio::Perl dependencies
      cpanm: name={{ item }}
      with_items:
        - Time::HiRes
        - LWP::UserAgent

    - name: install BioPerl
      cpanm: name=Bio::Perl
We can now try out this Ansible playbook on the testing virtual machine.
$ vagrant provision
==> default: Running provisioner: ansible...

PLAY [all] ********************************************************************

GATHERING FACTS ***************************************************************
ok: [default]

TASK: [install gcc required to build some Perl modules] ***********************
changed: [default]

TASK: [install cpan and perl-devel] *******************************************
changed: [default] => (item=perl-devel,perl-CPAN)

TASK: [download cpanm] ********************************************************
changed: [default]

TASK: [install cpanm so that we can use the ansible cpanm module] *************
changed: [default]

TASK: [add cpanm symbolic link to /usr/bin/] **********************************
changed: [default]

TASK: [install implicit Bio::Perl dependencies] *******************************
ok: [default] => (item=Time::HiRes)
ok: [default] => (item=LWP::UserAgent)

TASK: [install BioPerl] *******************************************************
ok: [default]

PLAY RECAP ********************************************************************
default                    : ok=8    changed=5    unreachable=0    failed=0
Great it works! Almost time to deploy to the production machine. However, first let us commit our scripts to version control.
Git - tracking what you are doing
One of the beauties of Ansible is that it uses the human readable YAML file format. This means that you get descriptive configuration files that can be used directly to configure your machines.
Another beauty of text files is that they can be tracked in version control. This means that you can get an audit record of how the specification of the configuration evolved over time. Furthermore, you can use the ability to add comments to your commits to specify the reason why particular changes needed to be made.
Let us commit our work to version control.
$ git init
$ git add Vagrantfile
$ git commit -m "Vagrant file with CentOS 6.5 configured by playbook.yml"
$ git add playbook.yml
$ git commit -m "Playbook for installing Bio::Perl"
Configuring your production machine
Now that we have built up our Ansible configuration script and committed it to version control we can use it to configure the production machine.
In order to achieve this we need to put our public ssh key on the production server.
If you have not already created an ssh key pair you can do so using
ssh-keyen. You can then append the public key to the authorized_keys
files in the .ssh directory on the production server. For more detail see, for example,
Etel Sverdlov blog post on How To Set Up SSH
Keys.
Up until this point we have not used Ansible directly, we have only used it through Vagrant. We will remedy that now.
First of all Ansible needs to know about the machines that you want it to talk
to. By default Ansible looks for these in /etc/ansible/hosts.
Alternatively, you can specify a “hosts” file using the command line option
-i. Suppose that your server’s host name was scicomp.example.com you could
then add this to a file named hosts.
scicomp.example.com
A simple way to check that everything is setup as it should be is to make use of Ansible’s ping module. If everything is working you will see something along the lines of the below.
$ ansible -i hosts -m ping scicomp.example.com
scicomp.example.com | success >> {
    "changed": false,
    "ping": "pong"
}
Otherwise, you will see something along the lines of the below.
$ ansible -i hosts -m ping scicomp.example.com
scicomp.example.com | FAILED => SSH encountered an unknown error during the connection. We recommend you re-run the command using -vvvv, which will enable SSH debugging output to help diagnose the issue
The ansible program can be an extremely effective way of issuing ad-hoc
commands to remote machines. However, we have a playbook that we want to run so
we want to use ansible-playbook.
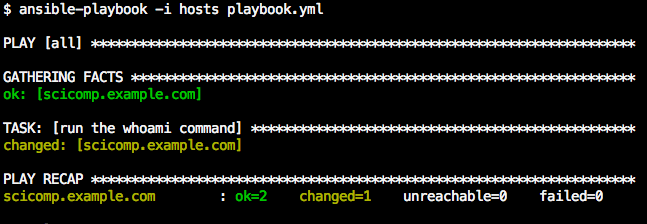
$ ansible-playbook -i hosts playbook.yml

PLAY [all] ********************************************************************

GATHERING FACTS ***************************************************************
ok: [scicomp.example.com]

TASK: [install gcc required to build some Perl modules] ***********************
changed: [scicomp.example.com]

TASK: [install cpan and perl-devel] *******************************************
changed: [scicomp.example.com] => (item=perl-devel,perl-CPAN)

TASK: [download cpanm] ********************************************************
changed: [scicomp.example.com]

TASK: [install cpanm so that we can use the ansible cpanm module] *************
changed: [scicomp.example.com]

TASK: [add cpanm symbolic link to /usr/bin/] **********************************
changed: [scicomp.example.com]

TASK: [install implicit Bio::Perl dependencies] *******************************
ok: [scicomp.example.com] => (item=Time::HiRes)
ok: [scicomp.example.com] => (item=LWP::UserAgent)

TASK: [install BioPerl] *******************************************************
ok: [scicomp.example.com]

PLAY RECAP ********************************************************************
scicomp.example.com        : ok=8    changed=5    unreachable=0    failed=0
And now the production machine is configured with Bio::Perl!
A confession
I did not actually have the IT department create a production machine for me just for the purposes of this blog post. Instead I used Vagrant to create a virtual one for me by simply removing the provisioning section we added earlier and uncommenting the line for setting up the machine on a private network.
Vagrant.configure(2) do |config|

  config.vm.box = "chef/centos-6.5"

  config.vm.network "private_network", ip: "192.168.33.10"

end
To make sure I got the machine in a clean state I simply destroyed it and spun it up again.
$ vagrant destroy
    default: Are you sure you want to destroy the 'default' VM? [y/N] y
==> default: Forcing shutdown of VM...
==> default: Destroying VM and associated drives...
$ vagrant up
I then used the Ansible hosts file below, all in one long line, to specify
how to connect to the machine.
scicomp.example.com ansible_ssh_host=192.168.33.10 ansible_ssh_user=vagrant ansible_ssh_private_key_file=.vagrant/machines/default/virtualbox/private_key
Using the above we have pretty much created a staging virtual machine in a couple of minutes. Pretty cool!
Summary
As a computational scientist you are likely to get exposed to systems administration to some extent. In particular for installing scientific software.
In an ideal world you should try to make the installation of your software as reproducible and automated as possible, because your machine will fall over at one point or another. When this happens you want to be in a position where you simply need to press a button to get your new machine configured with all the software that you need to work effectively.
Vagrant is a tool for spinning up virtual machines from the command line. Virtual machines are great for testing scripts that you create to configure your machines.
Ansible is a wonderful tool for scripting the configuration of your machines. It is very powerful, yet easy to use. Make it your friend!
Finally, I highly recommend that you keep your Vagrant and Ansible files under version control. It will give you more confidence when experimenting with new setups and it provides a way for you to track the progression of your machines configurations.
In the next post we will learn how to convert the playbook created in this post into reusable components.